Introduction
For this course, attendees will need to install the programming language Python, and an editor, where we can type commands, and run our programs. We will also need an up-to-date web browser: we recommend a current version of Chrome, Safari, or Firefox.
Step 1. Installing Python (by installing Anaconda)
Python, and also various editors, are included in the all-in-one installer called Anaconda. This makes it easy to install Python and various scientific add-ons, without having to know too much about programming before starting out.
The Software Carpentries have created some excellent guides for installing Anaconda. These can be found here, along with video tutorials for each operating system. Please follow the relevant installation guide for your operating system (macOS, Windows, or Linux).
Further installation instructions can be found on the Anaconda web-pages here. These are a bit more in-depth!
Step 2. Installing an editor
In the first session we will use the JupyterLab editor that is included with Anaconda. We will work in a Jupyter notebook within this editor. In the second session, we will continue to use the JupyterLab editor, but might introduce Microsoft Visual Studio Code, one of the most popular code editors that you will probably end up using at some point.
Please note that you can use Jupyter notebooks without using JupyterLab. JupyterLab provides additional editor functionality over a notebook, and makes it easier to write scripts/more substantial pieces of code. A key element of this is providing easy access to a terminal/shell window, where system/shell commands can be run.
To install JupyterLab, please follow the installation instructions for Anaconda above, as JupyterLab is included with Anaconda.
Step 3. Launching JupyterLab
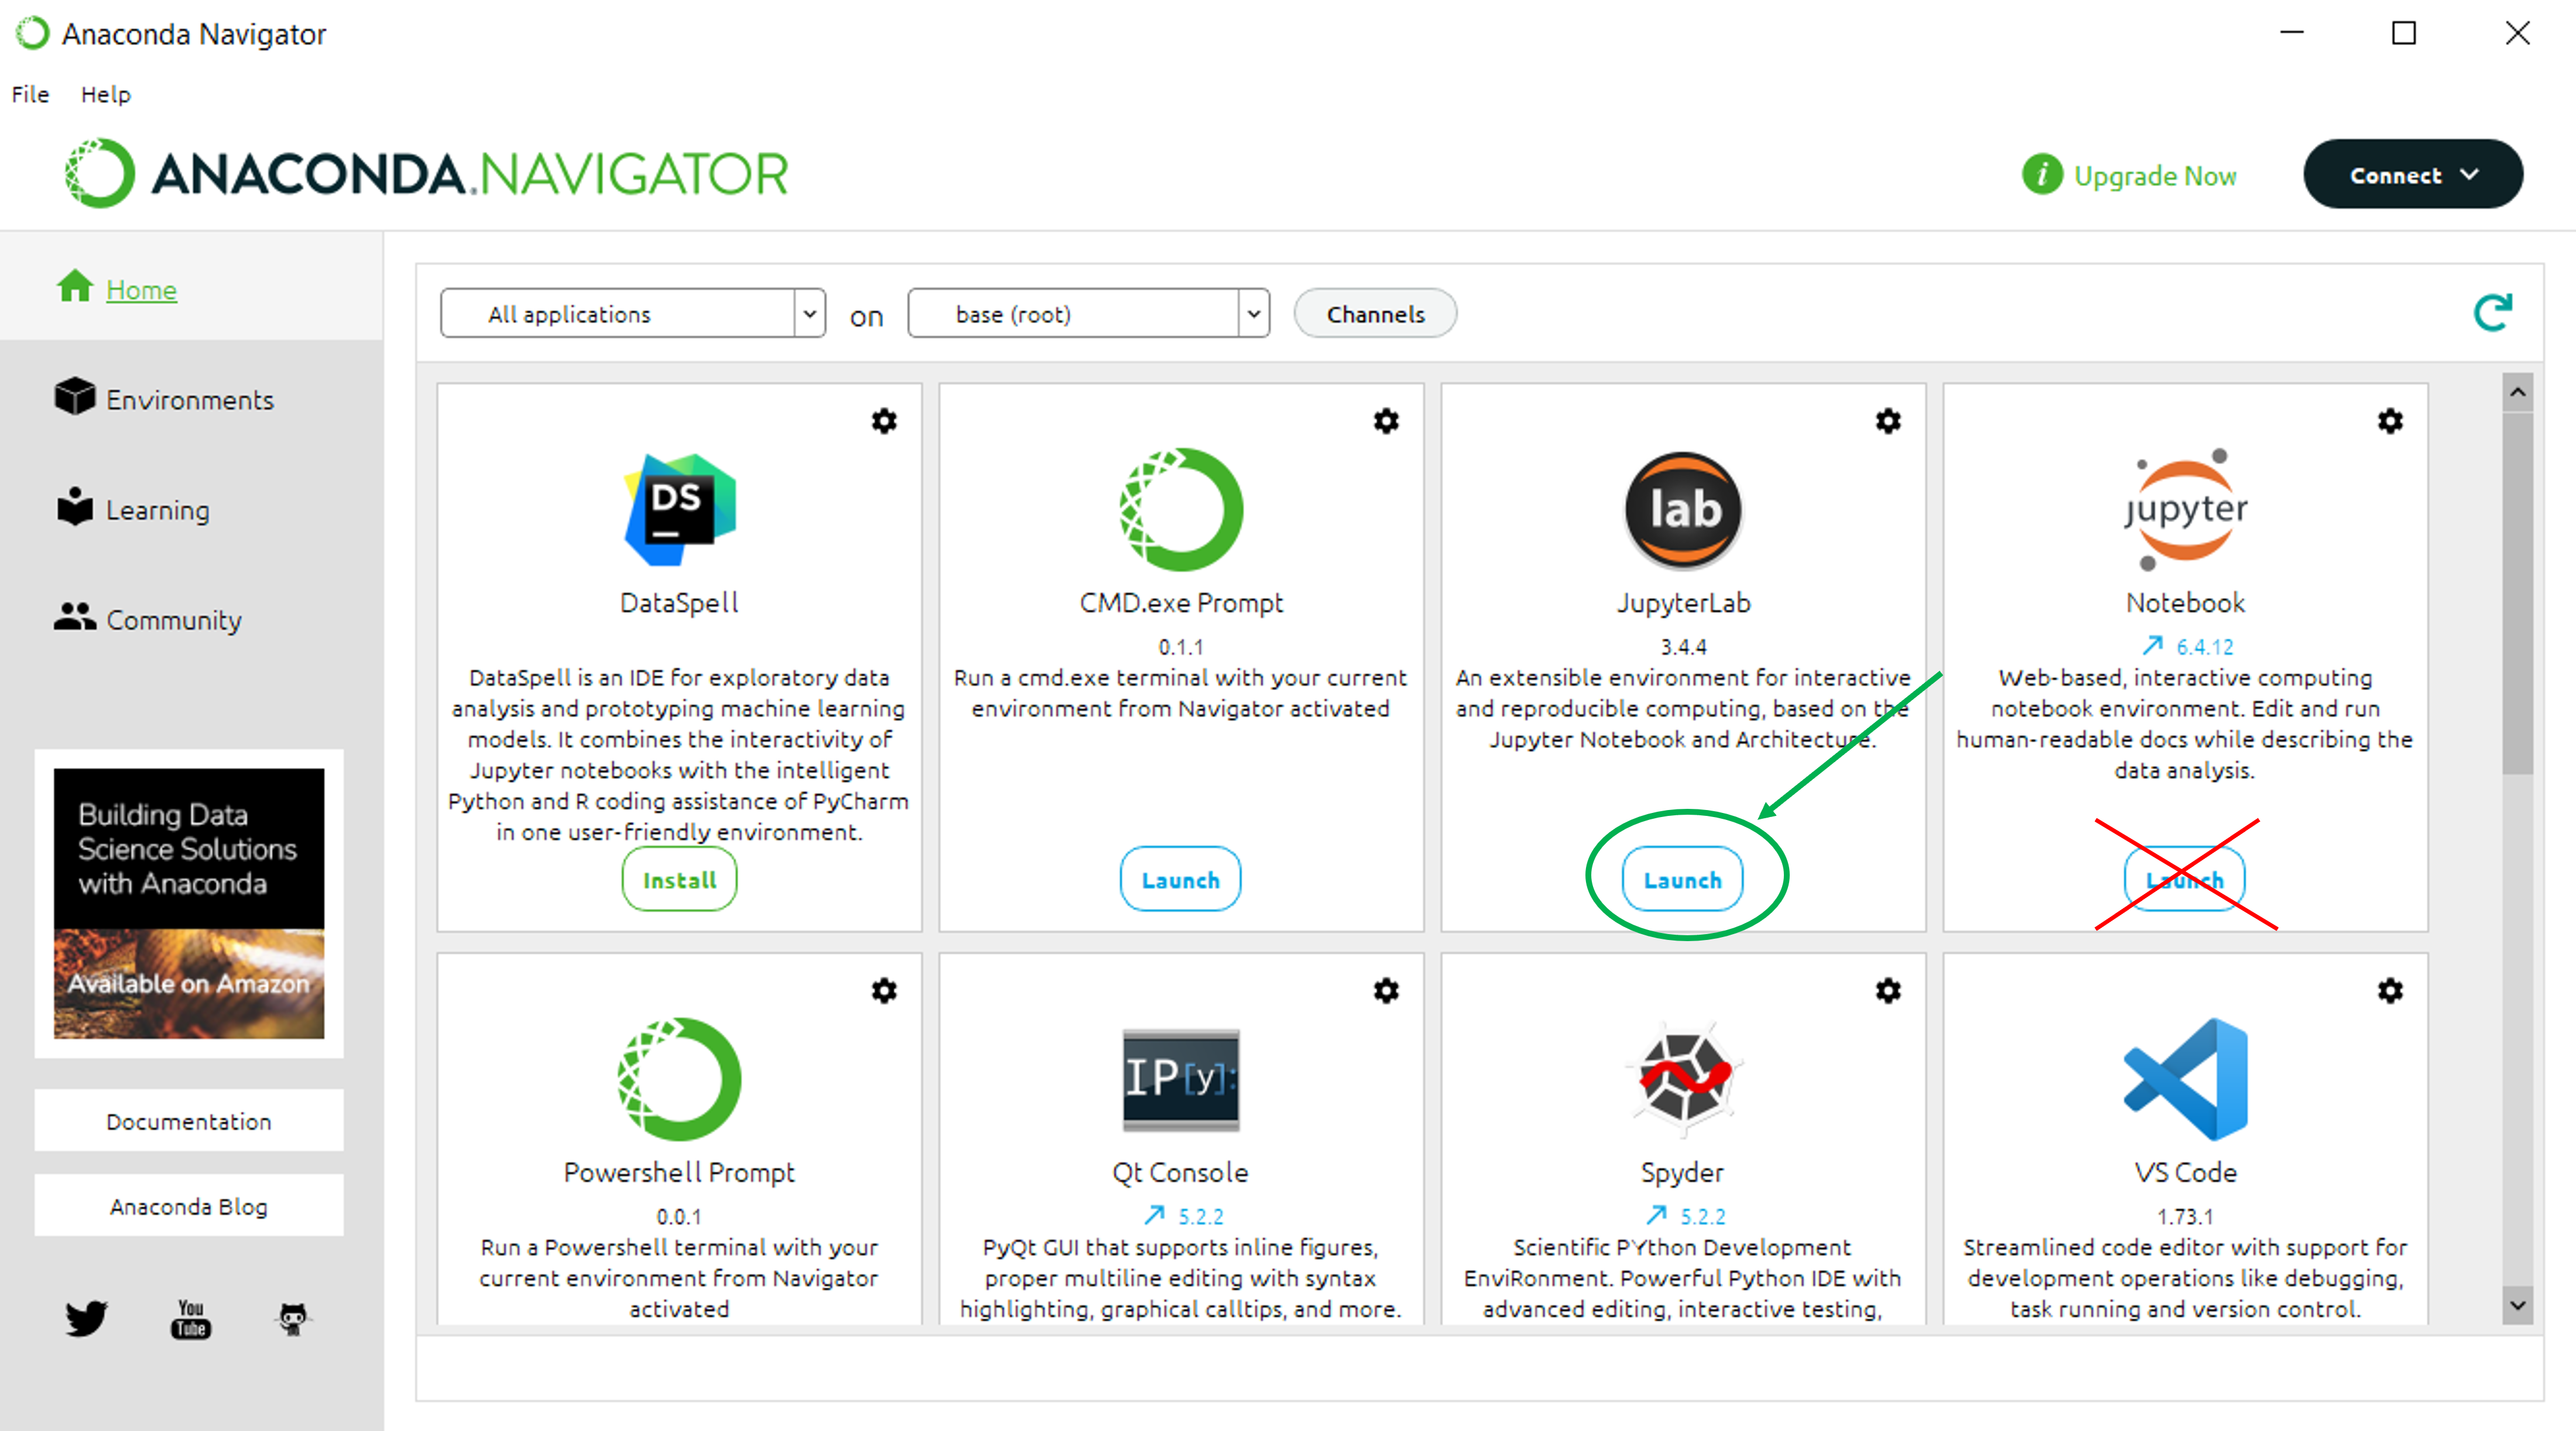
To launch JupyterLab, we first need to start up Anaconda Navigator. This can be done by searching for Anaconda Navigator in your system search bar, and clicking on the green, circular icon.
Once this has opened, click the JupyterLab launch button, as below. This is different from selecting “Notebook”.
This should launch a web browser and open a tab for JupyterLab. The title of the tab will be JupyterLab. It will look like:
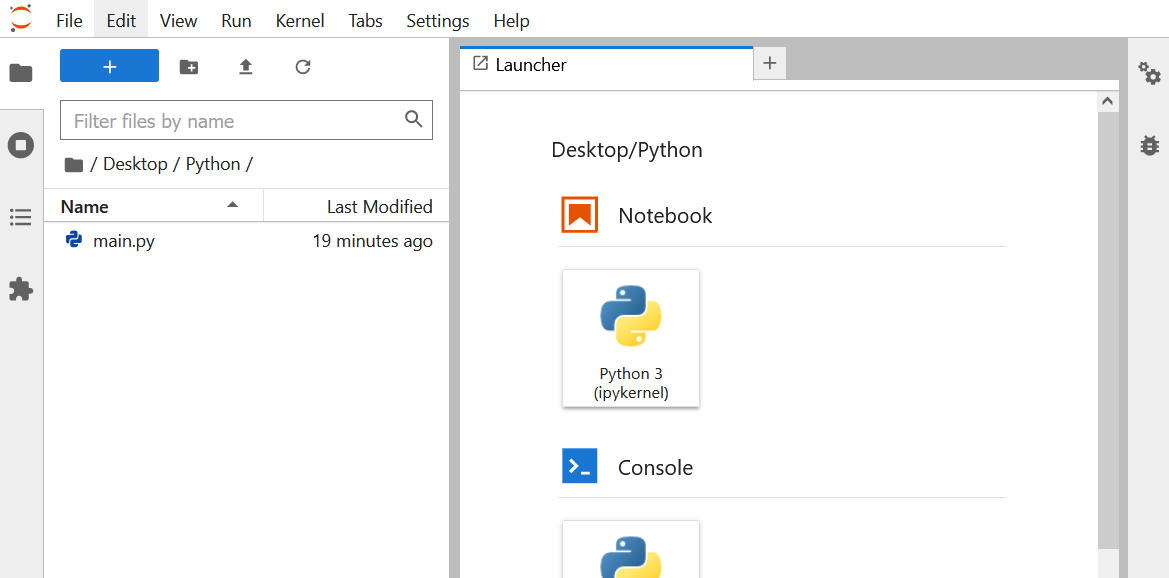
Once you are here you are ready for the first session.
Other ways to launch JupyterLab
You can also launch JupyterLab from the command line. On Windows, open up an Anaconda PowerShell, or a command line shell and type the following. On macOS, open a terminal window, and type the same command.
jupyter lab
Extra: Installing VSCode
VSCode (Visual Studio Code) is a popular editor created by Microsoft. It has a large collection of extensions to help editing various programming languages. One of the languages that is well supported is Python.
We might take a look at VSCode during the second session, but these installation instructions are mostly here for your interest/benefit, as you might move on to using VSCode quite quickly.
You can download VSCode from code.visualstudio.com. There is a tutorial on how to setup Python with VSCode at python-tutorial.
To check that you have everything installed open VSCode. Then open a terminal window in VSCode (Terminal -> ‘New Terminal’).
In this terminal type python --version. If you see something similar to the following,
you have set everything up correctly.
Python 3...
Help
Please have a go at installing Anaconda yourself. If you are struggling, we will be holding an online drop-in before the first session. An email link to this drop-in session will be made available to you once your registration on the course has been confirmed.
FAQ
- My browser isn’t showing anything and I cannot change browser!
-
From StackOverflow the basic answer is to create a config file and specify the browser. A config file can be created with
Jupyter notebook --generate-configThen the
c.NotebookApp.browserandc.ServerApp.browseroptions can be set to the appropriate browser.
-
- What is the difference between JupyterLab and a Jupyter Notebook?
- JupyterLab is an editor (or integrated development environment, IDE) which can be used to create and edit notebooks and scripts.
- A notebook is a particular format of script that allows code and text blocks to be interwoven. The code blocks can be executed in line to show their answers. This is a helpful format for explaining, demonstrating and exploring methods, and commonly used in research & teaching environments.